


Big Red Cloud Open Banking
This guide has been written to instruct users in importing Bank transactions and create lodgements and bank payments.
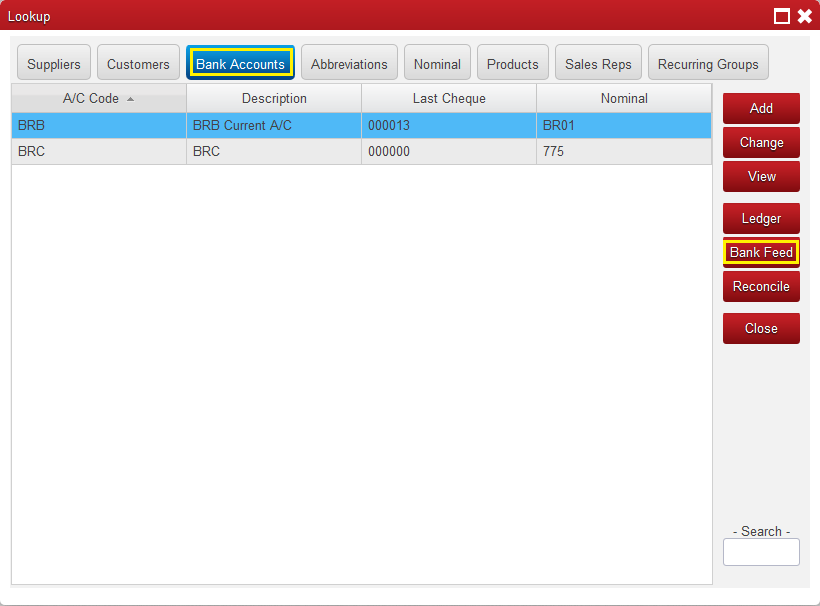
Locating the Bank Feed Button
Open Banking is a new system that will greatly improve the ability and reliability to import banking statements from your bank into the Big Red Cloud accounts. Big Red Cloud users should no longer need to download CSV files which can be awkward to use when using Open Banking. To bring this exciting new development to the Big Red Cloud we have teamed up with Plaid who have vast experiences in financial services software development
- Step one go to Lookup and Bank Accounts.
And click on Bank Feed
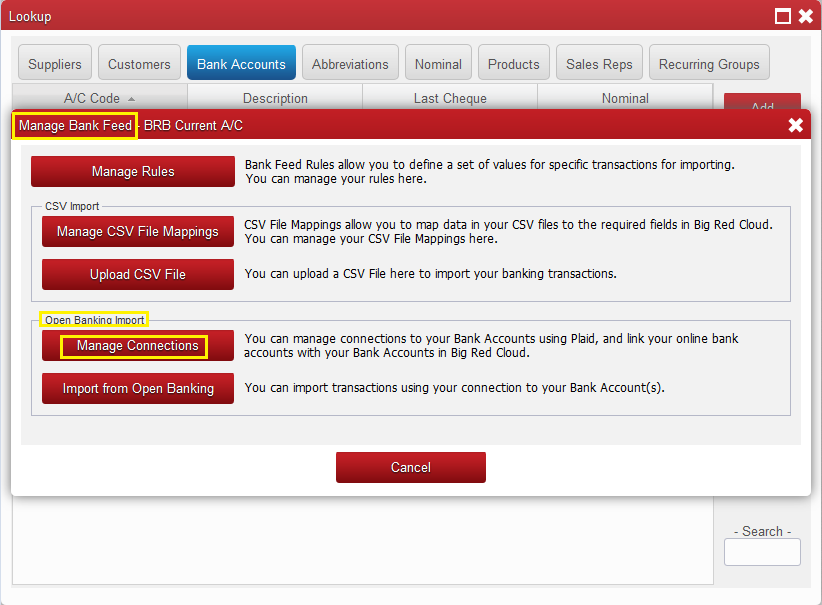
2. When the Manage Bank Feed window opens in the Open Banking Import section click on the Manage Connections
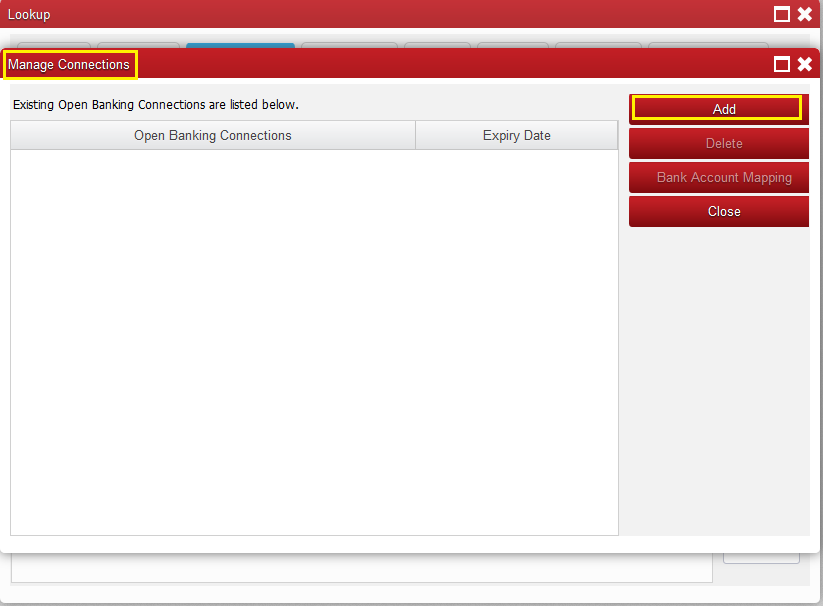
3. On the Manage Connections window click on Add
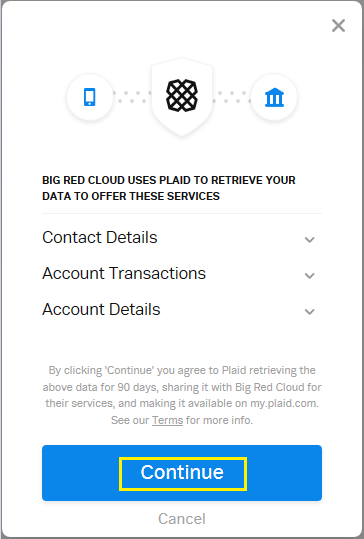
4. The next window is a T&C for Plaid to retrieve your data to offer these services you will need to click Continue.
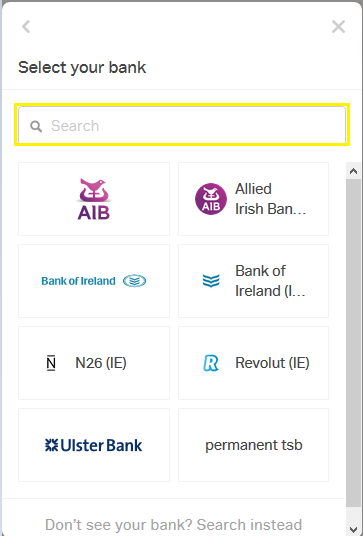
5. The next step you select your bank. To do so you simply look for your bank in the list and click on it or you can type the name of your bank in the search bar at the top of the window.
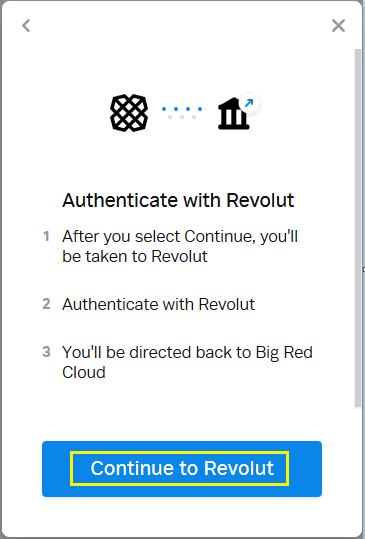
6. From this point the steps are based on Revolut Banking method of authorization other banks methods will differ. When you select your bank it will give you an Authentication window read on screen instructions and click Continue
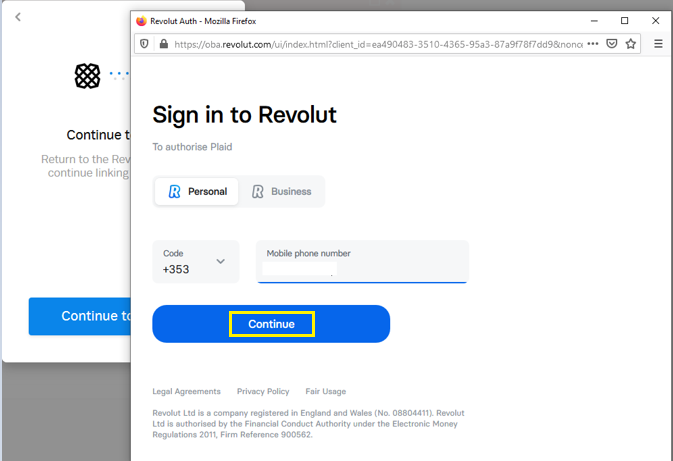
7. Once you click Continue on the previous step it will open a new smaller window.
On this window you will need to enter your Phone number to authorize Plaid then click Continue
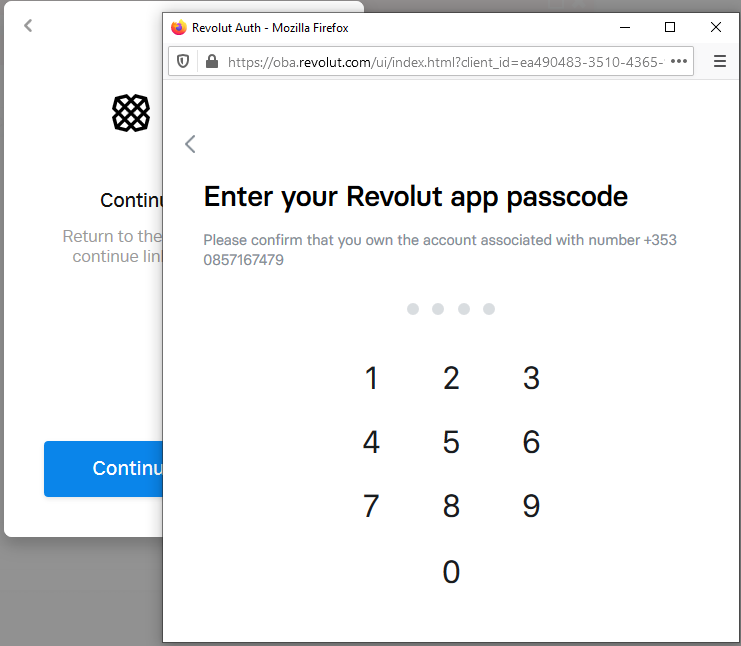
8. On the Next window you will need to enter your Revolut App Pin
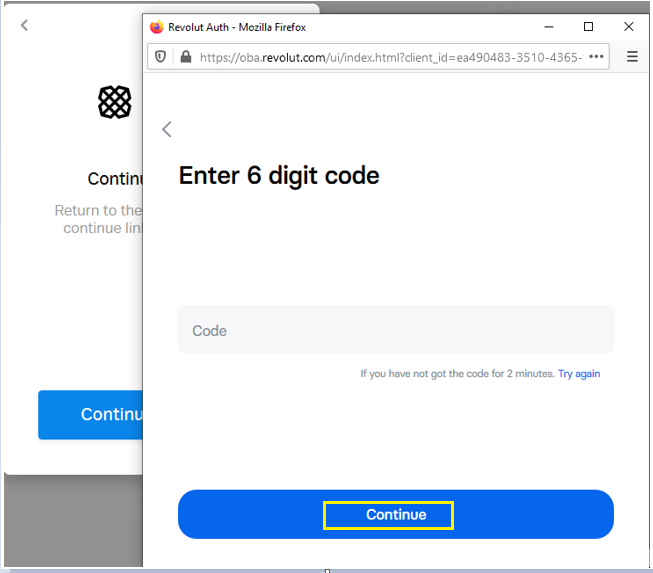
9. You will receive a 6 digit code to your phone that will need to be entered into the next window, and click Continue.
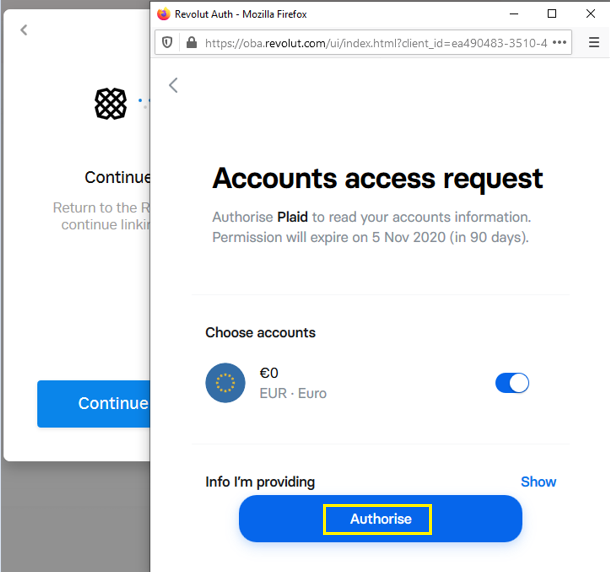
10. The authorization window will display, and you will need to click on Authorize. It will then take a moment to return a Granted
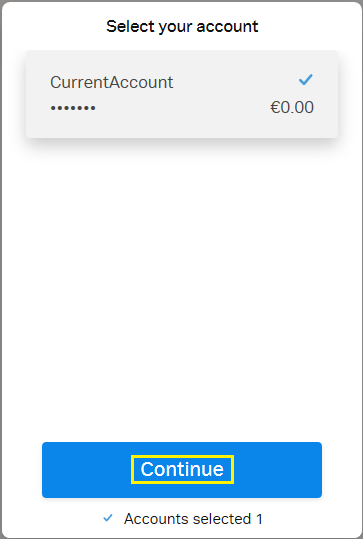
11. The next window will be a confirmation window and to confirm which bank account if you have more than one.
Click Continue
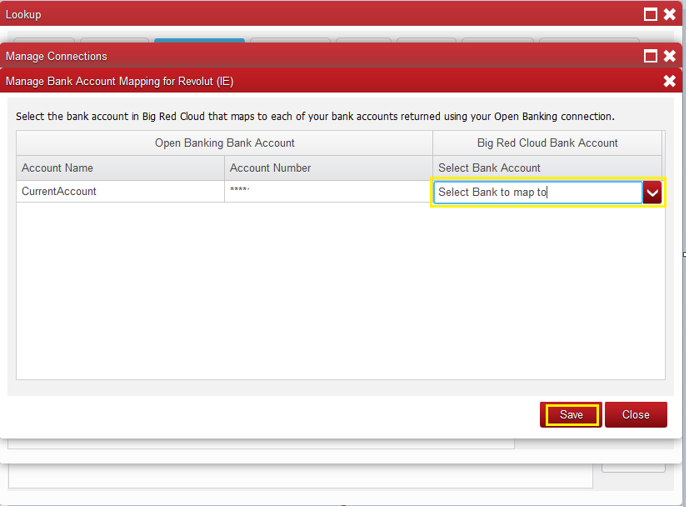
12. That is the end of the authorization process final step is to map the bank.
In the drop down select the Big Red Cloud Bank Account you wish to be mapped to the bank to and click on Save.
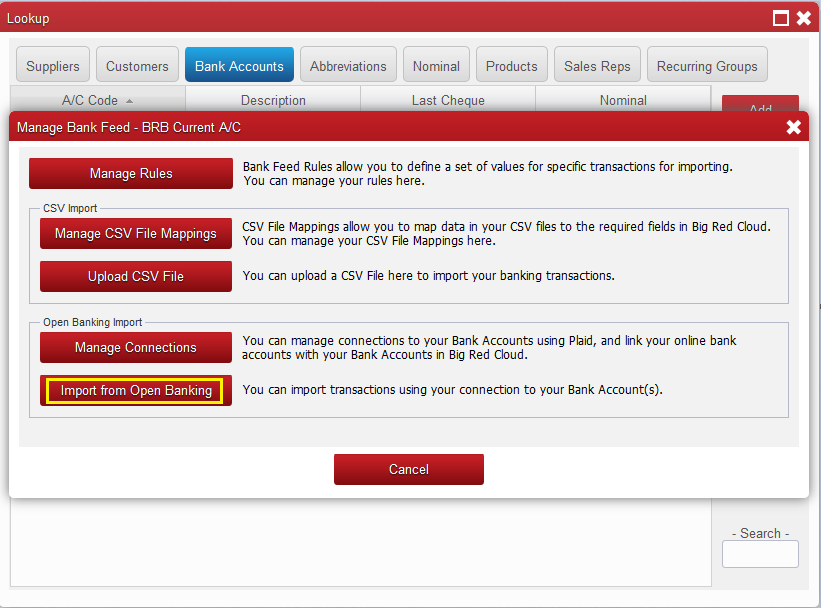
13. To import transaction from your Bank you will now need to go to Lookup and Bank Accounts and highlight the bank setup for Open Banking then click on Bank Feed

14. Then click on the button Import from Open Banking
15. On the next window it will prompt you to input the period you wish to import banking transaction for.
Select the dates and click on OK
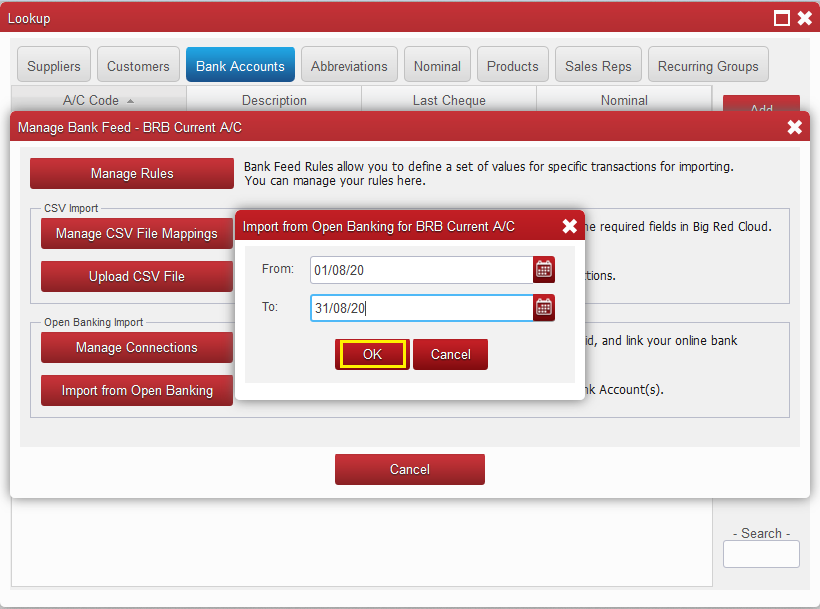
If you now click ‘Ok’ you will be brought to the Review and Import Transactions Screen where you will see a list of the transactions within your file and the options available for them.
Any Credit transactions with a date inside your current financial year will be automatically ticked to create both a
Cash Receipt and a Lodgement.
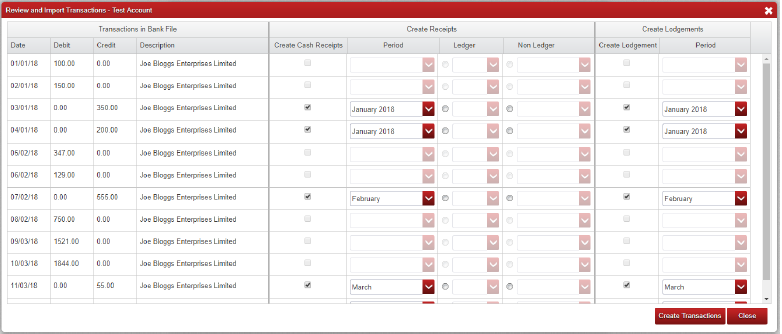
The screen above is split into 4 sections (the first 3 of which are visible above).
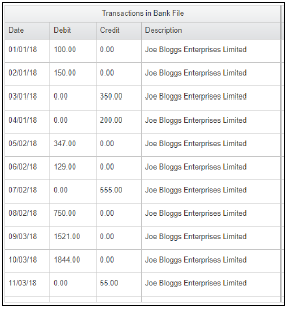
On the left hand section you have the transaction details;
• Date
• Debit and Credit amounts
• The Description.
In the second column you have the Cash Receipts details;
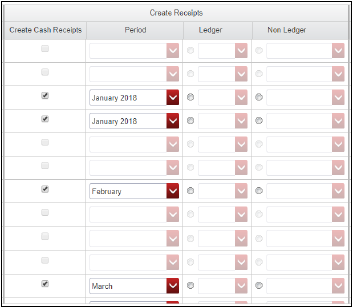
• A check box to pick whether or not the Cash Receipt is
created
• A drop down list to choose the period it is added to if it is
created
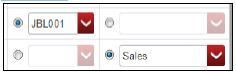
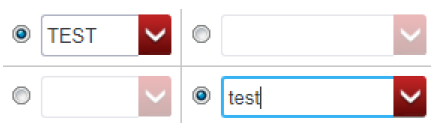
• A radio button to say if it is a Cash Receipt from a customer
(Ledger) or not (Non-Ledger)
• In each of those cases a drop down list to choose the
Customer Account or the Analysis Category the entry will be
added to.
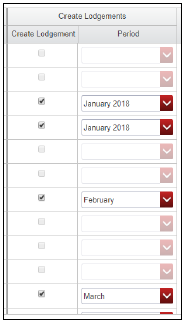
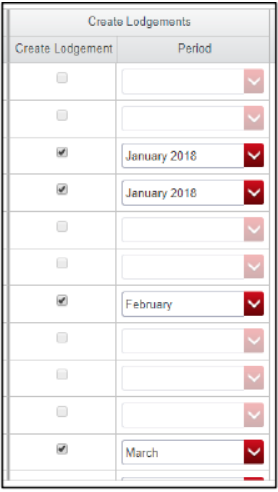
On the right are the lodgements, here you have;
• A check box to pick whether or not the lodgement is created
• A dropdown list to choose the period it will be added to.
Currently only the Cash Receipts and Lodgements (the Credit transactions) can
be imported so the Debit options (Bank Payments) cannot be ticked at this time.
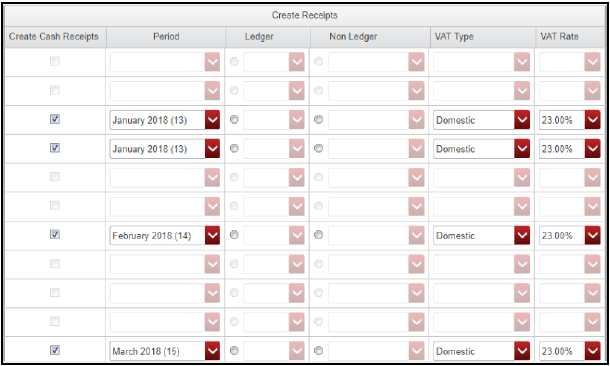
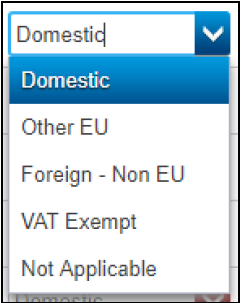
If you use Vat on Cash Receipts you will have two extra
columns, Vat Type and VAT Rate.
These columns will allow you to set the VAT Type for
your entry (Shown Below) as well as the VAT Rate that
will apply for it.
The Vat Rates available will be your usual VAT rates as
set in ‘Setup’ -> ‘Vat Rates’.
to the right are the lodgements, here you have;
On the far right is the Bank Payment details;
• A check box to pick whether or not the Bank
Payment is created
• A dropdown list to choose the period it is added to if
it is created
• A radio button to say if it is a Payment to a Supplier
(Ledger) or not (Non-Ledger)
• In each of those cases a dropdown list to choose the
Supplier Account or the Analysis Category the entry will
be added to.

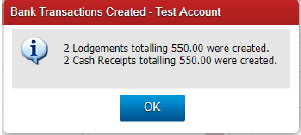
Once you click the Create Transactions option Big Red Cloud will
process the ticked transactions and create a lodgement (as a Cash
Payment) or a receipt (as a Cash Receipt) for each of them within the
Cash Book.
Once done it will return a message telling you how many transactions
have been created and the total value of all created transactions.
If the transaction validation fails when ‘Create Transactions’ is clicked you will need to correct those errors before the import can succeed.
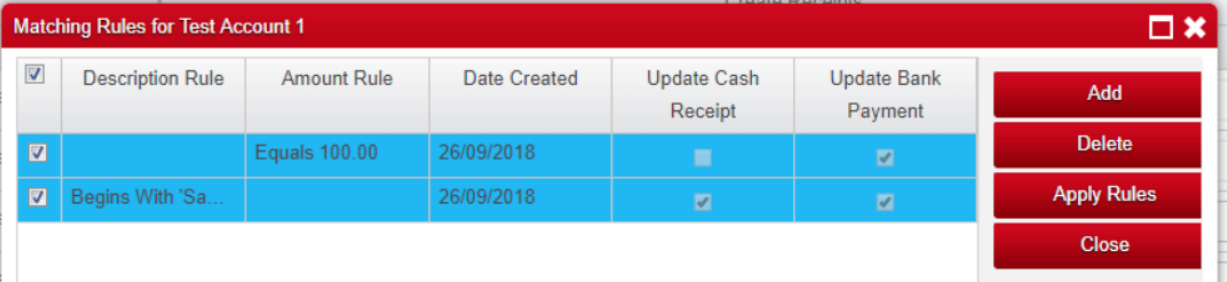
Creating Bank Feed Rules
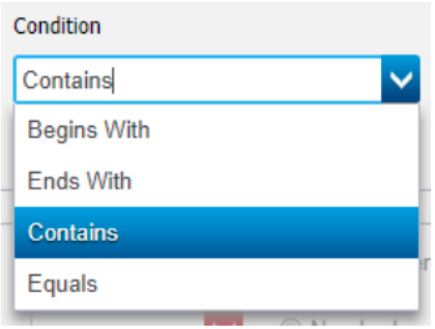
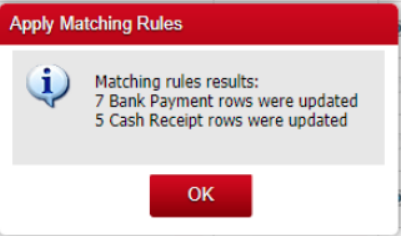
It is possible to create rules which can be applied to your bank files in order to make the import easier.

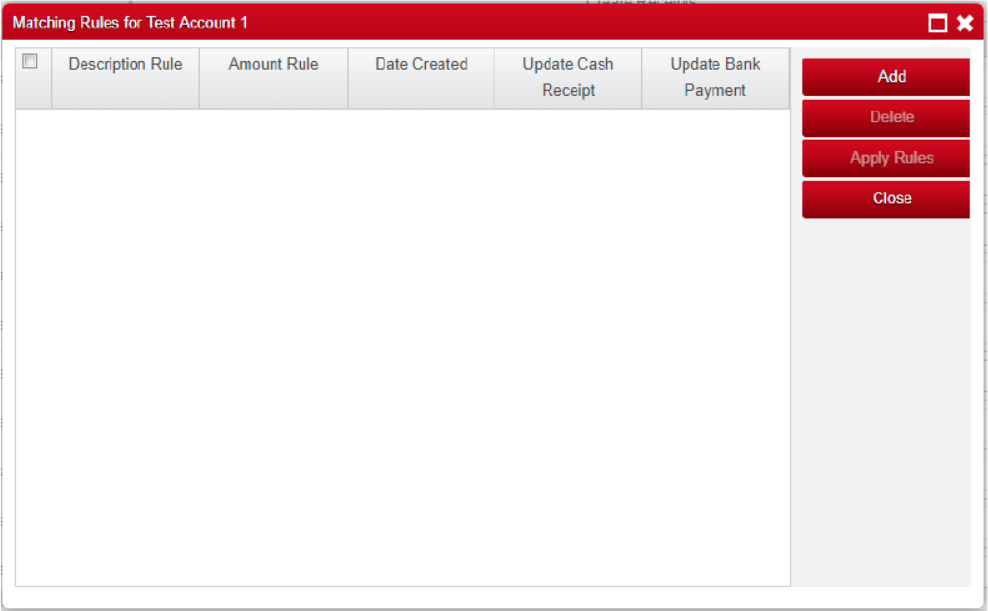
Once the screen has been opened select ‘Add’ to create a new rule and the ‘Add a Matching Rule’ option will appear.
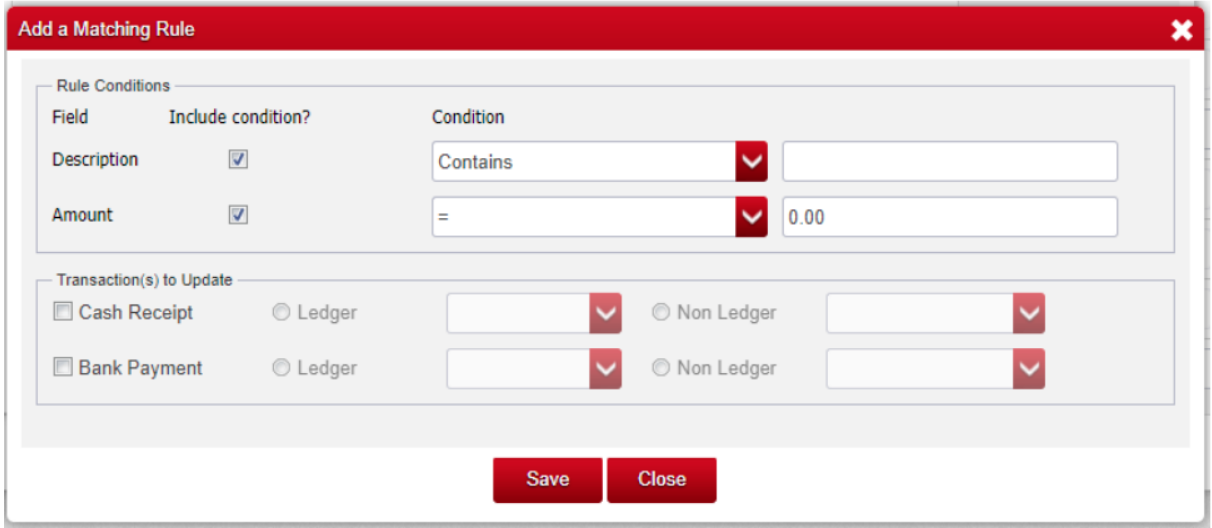
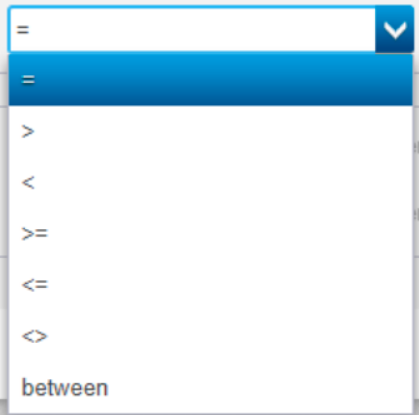
Rules Conditions: